Java.lang.NoClassDefFoundError: com/fasterxml/jackson/databind/exc/InvalidDefinitionException

1
2
3
4
5
6
<!-- change jackson-databind version to 2.9.4 -->
<dependency>
<groupId>com.fasterxml.jackson.core</groupId>
<artifactId>jackson-databind</artifactId>
<version>2.9.4</version>
</dependency>

mysql运行报The server time zone value ‘Öйú±ê׼ʱ¼ä’ is unrecognized or represents more than one time z

1
2
show variables like "%time_zone"
set global time_zone="+8:00"

or

1
2
3
4
5
<dependency>
<groupId>mysql</groupId>
<artifactId>mysql-connector-java</artifactId>
<version>5.1.39</version>
</dependency>

idea Error parsing SQL Mapper Configuration. Cause: java.io.IOException: Could not find resource

https://blog.csdn.net/u010648555/article/details/70880425
方案1:不将xml放到src目录下面,将xxxMapper.xml放到Maven构建的resource目录下面!
方案2:在Maven的pom文件中,添加下面代码:

1
2
3
4
5
6
7
8
9
10
11
<resources>
<resource>
<directory>src/main/resources</directory>
</resource>
<resource>
<directory>src/main/java</directory>
<includes>
<include>**/*.xml</include>
</includes>
</resource>
</resources>

生命周期

1
2
3
4
5
6
7
8
9
Bean的完整生命周期经历了各种方法调用,这些方法可以划分为以下几类:

1、Bean自身的方法  :  这个包括了Bean本身调用的方法和通过配置文件中<bean>的init-methoddestroy-method指定的方法

2、Bean级生命周期接口方法  :  这个包括了BeanNameAwareBeanFactoryAwareInitializingBeanDiposableBean这些接口的方法

3、容器级生命周期接口方法  :  这个包括了InstantiationAwareBeanPostProcessorBeanPostProcessor 这两个接口实现,一般称它们的实现类为“后处理器”。

4、工厂后处理器接口方法  :  这个包括了AspectJWeavingEnabler, ConfigurationClassPostProcessor, CustomAutowireConfigurer等等非常有用的工厂后处理器  接口的方法。工厂后处理器也是容器级的。在应用上下文装配配置文件之后立即调用。

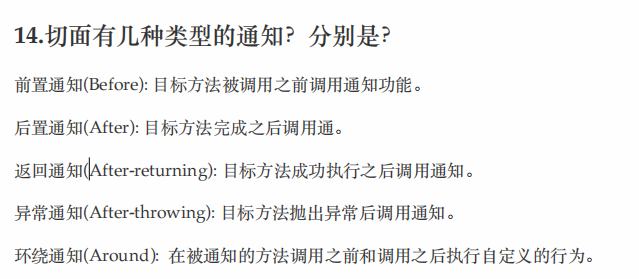
AOP 切面的几种通知

spring-2021-08-24-18-40-42

Spring Bean 的生命周期(非常详细) - Chandler Qian - 博客园

常见问题

版本问题:
例如:4.0.0.RELEASE版本对 Component 和 ComponentScan 支持不好,
4.3.2.RELEASE是支持很好的。

sprring boot 测试

1
2
3
4
5
6
7
8
9
10
11
12
@RunWith(SpringRunner.class)
@Profile("dev")
@SpringBootTest(classes = ApiTvApplication.class)
public class DemoServiceImplTest {
@Autowired
DemoServiceImpl demoService;

@Test
public void list() {

}
}

安装客户端

https://dba.stackexchange.com/a/258890

Install just client with brew:

1
2
brew install pgcli

then link it:

1
brew link --force libpq

as output you will get the path to psql:

1
2
If you need to have this software first in your PATH instead consider running:
echo 'export PATH="/usr/local/opt/libpq/bin:$PATH"' >> ~/.zshrc

to find this path again:

1
brew info libpq

数据导入和导出

导出数据库

1.导出单个表

例:从ip为xxx的数据库monitor中导出threshold的表结构和数据到本地文件threshold.sql:
pg_dump -t threshold -h 135.32.94.142 monitor -U monitor -p 5432 -f threshold.sql
参数说明:-t 指定导出的表名;-h 数据库地址;-U 数据库用户;-p 访问端口;-f 导出到指定文件;

2.导出所有表和所有数据

例:从ip为xxx的数据库monitor导出所有表结构和数据到文件monitor.sql:
pg_dump -h 135.32.94.142 monitor -U monitor -p 5432 -f monitor.sql
3.仅导出所有表结构

例:从ip为xxx的数据库monitor导出所有的表结构到文件monitor.sql:
pg_dump -s -h 135.32.94.142 monitor -U monitor -p 5432 -f monitor.sql
参数说明:-s 表示只导出表结构,不导数据

注:一般数据库数据量比较大,如果远程导出所有的表结构和数据的话会非常慢,所有只导出表结构是个明智的选择。随后可以再导出单个重要表结构和数据进来。

导入数据库

1.导入到远程数据库

例:从本地文件threshold.sql导入表结构和数据到ip为xxx的数据库monitor:
psql -h 135.32.9.99 -d monitor -U monitor -f threshold.sql
参数说明: -h 数据库地址;-d 数据库;-U 指定用户;-f 要导入的文件 注:文件就是从数据库导出的文件。

2.导入到本地数据库
psql -h 0.0.0.0 -d monitor -U monitor -p 5432 -f monitor.sql
参数说明: -p 指定数据库服务端口,视情况而变,默认是5432端口的可以不加

————————————————
版权声明:本文为CSDN博主「比特叔叔」的原创文章,遵循CC 4.0 BY-SA版权协议,转载请附上原文出处链接及本声明。
原文链接:postgresql数据库导入导出_比特叔叔的博客-CSDN博客

基本用法

1
2
3
4
5
6
7
8
9
10
11
12
13
14
15
16
17
18
19
20
21
22
23
24
25
26
27
28
29
30
31
# 1 创建数据库
CREATE DATABASE testdb OWNER dbuser;

# 2 列出所有数据库
\l

# 3 连接数据库
\c testdb

# 4 创建表和查看表
CREATE TABLE student(id int, name varchar(20), birth_date date);
\d # 查看所有表
\d student # 查看当前表结构
\d+ student # 显示更多的信息,如:与表列关联的注释

# 5 插入数据
INSERT INTO student(id, name, birth_date) values(1, 'a', '2010-10-10');
INSERT INTO student(id, name, birth_date) values(2, 'b', '2010-10-12');

# 6 查询表
SELECT * FROM student;

# 7 修改
UPDATE student SET name='aa' WHERE id = 1;
UPDATE student SET name='bb' WHERE id = 2;

# 8 删除
DELETE FROM student where id = 1;

# 9 删除表
DROP TABLE student;

安装

1
2
sudo apt-get install postgresql-client
sudo apt-get install postgresql
1
2
3
4
5
6
7
8
9
\h:查看SQL命令的解释,比如\h select
\?:查看psql命令列表。
\l:列出所有数据库。
\c [database_name]:连接其他数据库。
\d:列出当前数据库的所有表格。
\d [table_name]:列出某一张表格的结构。
\du:列出所有用户。
\e:打开文本编辑器。
\conninfo:列出当前数据库和连接的信息。

注意

  • 要用;来结束语句;
  • 字符串要用单引号'来包裹;

enable remote connection

sudo service postgresql restart

参考资料

Permission denied for relation

1
2
3
4
5
6
7
-- login in admin:
psql -U postgres -d exampledb -h 127.0.0.1 -p 5432;
-- grant
GRANT ALL PRIVILEGES ON ALL TABLES user_tbl TO dbuser;

-- login in dbuser
psql -U dbuser -d exampledb -h 127.0.0.1 -p 5432;

命令

https://stackoverflow.com/questions/26277356/how-to-get-current-database-and-user-name-using-a-select-in-postgresql/26277430

查看当前用户;

1
select user;

查看当前数据库

1
select current_database();

pgcli

https://www.pgcli.com/config

注意

在修改某个字段类型之前,最好删除这个字段的约束,
修改完后再把合适的约束添加上去。《PostgreSQL 修炼之道》p166

插入或更新

1
INSERT INTO contacts VALUES (1,'n1', '{15200000000, 15200000001}', 'shenzhen') on conflict (id) do UPDATE set phone = excluded.phone;

插入数组

1
2
3
4
5
6
7
create TABLE contacts(
id int primary key,
name varchar(40),
phone varchar(32)[],
address text);

INSERT INTO contacts VALUES (1,'n1', '{15200000000, 15200000001}', 'shenzhen')

https://stackoverflow.com/questions/33335338/inserting-array-values

批量插入数据

1
2
3
4
5
6
7
create table student(student_no int, student_name varchar(20), age int, class_no int);

INSERT INTO student select generate_series(1,23), concat('s',generate_series(1,23)),18, 1
on conflict (student_no) do update
set student_name=excluded.student_name,
age=excluded.age,
class_no=excluded.class_no;

修改默认的schema

https://stackoverflow.com/questions/2875610/permanently-set-postgresql-schema-path

1
ALTER DATABASE lou SET search_path TO lou, osdba,postgres,public

移除一句话中的某个单词的词尾:
如: select key_error from table1;
如果想要删除_error,可以按Alt+D;

Bash Shortcuts For Maximum Productivity
https://www.skorks.com/2009/09/bash-shortcuts-for-maximum-productivity/

SKORKS
Bash Shortcuts For Maximum Productivity
September 15, 2009 By Alan Skorkin 82 Comments

MaximumIt may or may not surprise you to know that the bash shell has a very rich array of convenient shortcuts that can make your life, working with the command line, a whole lot easier. This ability to edit the command line using shortcuts is provided by the GNU Readline library. This library is used by many other *nix application besides bash, so learning some of these shortcuts will not only allow you to zip around bash commands with absurd ease :), but can also make you more proficient in using a variety of other *nix applications that use Readline. I don’t want to get into Readline too deeply so I’ll just mention one more thing. By default Readline uses emacs key bindings, although it can be configured to use the vi editing mode, I however prefer to learn the default behavior of most applications (I find it makes my life easier not having to constantly customize stuff). If you’re familiar with emacs then many of these shortcuts will not be new to you, so these are mostly for the rest of us :).
Command Editing Shortcuts

Ctrl + a – go to the start of the command line
Ctrl + e – go to the end of the command line
Ctrl + k – delete from cursor to the end of the command line
Ctrl + u – delete from cursor to the start of the command line
Ctrl + w – delete from cursor to start of word (i.e. delete backwards one word)
Ctrl + y – paste word or text that was cut using one of the deletion shortcuts (such as the one above) after the cursor
Ctrl + xx – move between start of command line and current cursor position (and back again)
Alt + b – move backward one word (or go to start of word the cursor is currently on)
Alt + f – move forward one word (or go to end of word the cursor is currently on)
Alt + d – delete to end of word starting at cursor (whole word if cursor is at the beginning of word)
Alt + c – capitalize to end of word starting at cursor (whole word if cursor is at the beginning of word)
Alt + u – make uppercase from cursor to end of word
Alt + l – make lowercase from cursor to end of word
Alt + t – swap current word with previous
Ctrl + f – move forward one character
Ctrl + b – move backward one character
Ctrl + d – delete character under the cursor
Ctrl + h – delete character before the cursor
Ctrl + t – swap character under cursor with the previous one

Command Recall Shortcuts

Ctrl + r – search the history backwards
Ctrl + g – escape from history searching mode
Ctrl + p – previous command in history (i.e. walk back through the command history)
Ctrl + n – next command in history (i.e. walk forward through the command history)
Alt + . – use the last word of the previous command

Command Control Shortcuts

Ctrl + l – clear the screen
Ctrl + s – stops the output to the screen (for long running verbose command)
Ctrl + q – allow output to the screen (if previously stopped using command above)
Ctrl + c – terminate the command
Ctrl + z – suspend/stop the command

Bash Bang (!) Commands

Bash also has some handy features that use the ! (bang) to allow you to do some funky stuff with bash commands.

!! – run last command
!blah – run the most recent command that starts with ‘blah’ (e.g. !ls)
!blah:p – print out the command that !blah would run (also adds it as the latest command in the command history)
!$ – the last word of the previous command (same as Alt + .)
!$:p – print out the word that !$ would substitute
!* – the previous command except for the last word (e.g. if you type ‘find some_file.txt /‘, then !* would give you ‘find some_file.txt‘)
!*:p – print out what !* would substitute
maven: http://wiki.jikexueyuan.com/project/maven/
spring: https://wiki.jikexueyuan.com/project/spring

Spring

注解仅仅是对类加上了一些元信息,如果不使用反射等 API 对其进行探测、处理,和不加注解没有任何区别。
https://course.tianmaying.com/web-development+form-validation#

任何一个标注了@Bean 的方法,其返回值将作为一个 bean 定义注册到 Spring 的 IoC 容器,方法名将默认成该 bean 定义的 id。
http://tengj.top/2017/03/09/springboot3/

Spring Boot 常用注解(一) - 声明 Bean 的注解 - CSDN 博客
https://blog.csdn.net/lipinganq/article/details/79155072

JOOQ

https://www.jooq.org/doc/3.10/manual/

JOOQ 3.8.2 使用 教程:从入门到提高
https://amao12580.github.io/post/2016/04/JOOQ-from-entry-to-improve/

spring-boot-devtools

Spring Boot 1.3 has introduced devtools, a module to improve the development-time experience when working on Spring Boot applications. To enable it, just add the following dependency to your project:
(https://docs.spring.io/spring-boot/docs/current/maven-plugin/usage.html)

1
2
3
4
5
6
7
8
<dependencies>
<dependency>
<groupId>org.springframework.boot</groupId>
<artifactId>spring-boot-devtools</artifactId>
<version>2.1.1.RELEASE</version>
<optional>true</optional>
</dependency>
</dependencies>

When devtools is running, it detects change when you recompile your application and automatically refreshes it. This works for not only resources but code as well. It also provides a LiveReload server so that it can automatically trigger a browser refresh whenever things change.
Devtools can also be configured to only refresh the browser whenever a static resource has changed (and ignore any change in the code). Just include the following property in your project:

1
spring.devtools.remote.restart.enabled=false

配置

1
2
3
4
5
6
7
8
9
10
11
   _____
/ _ \__ _ __ ____ __________ _____ ____
/ /_\ \ \/ \/ // __ \ / ___/ _ \ / \_/ __ \
/ | \ /\ ___/ \___ ( <_> ) Y Y \ ___/
\____|__ /\/\_/ \___ >____ >____/|__|_| /\___ >
\/ \/ \/ \/ \/

// spring banner
// file name: src/main/resources/banner.txt
// design by http://patorjk.com/software/taag
// [18-SpringBoot——核心-基本配置 - https://github.com/Wang-Jun-Chao - CSDN博客](https://blog.csdn.net/DERRANTCM/article/details/77284924)

下面这两种有什么区别呢

1
2
3
4
5
6
7
<!-- 1 -->
<parent>
<groupId>org.springframework.boot</groupId>
<artifactId>spring-boot-starter-parent</artifactId>
<version>2.3.1.RELEASE</version>
<relativePath/>
</parent>
1
2
3
4
5
6
7
8
9
10
11
12
<!-- 2  -->
<dependencyManagement>
<dependencies>
<dependency>
<groupId>org.springframework.boot</groupId>
<artifactId>spring-boot-dependencies</artifactId>
<version>${spring-boot.version}</version>
<type>pom</type>
<scope>import</scope>
</dependency>
</dependencies>
</dependencyManagement>

参照spring.profiles.active=@profiles.active@的含义 - 毛会懂 - 博客园
在动态配置环境的过程中,如果用了 2(新建项目时自动生成的) 而没有用 1,就会导致报一个错误
@profiles.active@ IllegalStateException: Failed to load property source from spring.profile.active

参数验证

1
2
3
4
5
6
7
8
9
10
11
12
13
14
15
16
17
18
19
20
21
22
23
24
25
26
27
28
29
30
31
32
33
34
35
36
37
38
39
40
41
42
43
44
45
46
47
48
49
50
51
52
53
54
55
56
57
58
59
60
61
62
63
64
65
66
67
68
69
70
71
72
// controller
@RestController
@Api(tags = "[管理后台]-[放映厅]-片单管理API")
@RequestMapping("/playlist")
@RequiredArgsConstructor(onConstructor = @__(@Autowired))
@Validated
public class PlaylistController extends BaseController {
// ...
@ApiOperation(value = "列出片单", notes = "根据参数列出符合要求的片单")
@GetMapping("list")
public ResultMsg<PageInfo<PlaylistCo>> listPlaylist(@Valid PlaylistListQry qry) {
return renderSuccessData(playlistAdminService.listPlaylistByPage(qry));
}
}

// PlaylistListQry.java
@EqualsAndHashCode(callSuper = true)
@Data
@ApiModel(value = "列出片单列表参数实体")
public class PlaylistListQry extends CommonCommand {

@ApiModelProperty(value = "放映状态")
private Integer playStatus;

@NotNull(message = "页码不能为空") @Min(value = 1, message = "页码要大于0")
Integer pageNo;

@NotNull(message = "每页大小不能为空") @Min(value = 1, message = "每页大小要大于0")
Integer pageSize;
}

// 错误统一处理
@ControllerAdvice
@Order(value = Ordered.HIGHEST_PRECEDENCE)
@Slf4j
public class GlobalExceptionHandler {
@ExceptionHandler(ValidationException.class)
@ResponseBody
public ResponseVO handle(ValidationException exception) {
String message = null;
if (exception instanceof ConstraintViolationException) {
ConstraintViolationException exs = (ConstraintViolationException) exception;

Set<ConstraintViolation<?>> violations = exs.getConstraintViolations();
for (ConstraintViolation<?> item : violations) {
//打印验证不通过的信息
message = item.getMessage();
break;
}
}

// 处理实体字段验证不通过异常
if( exception instanceof MethodArgumentNotValidException){
message = getDefaultMessageStr((MethodArgumentNotValidException) e);
}

return ResponseVO.buildIllegalMsg(message);

}

private String getDefaultMessageStr(MethodArgumentNotValidException e) {
BindingResult result = e.getBindingResult();
final List<FieldError> fieldErrors = result.getFieldErrors();
String defaultMessageStr = "";
if (!CollectionUtil.isEmpty(fieldErrors)) {
final List<String> msgList = fieldErrors.stream().map(FieldError::getDefaultMessage)
.collect(Collectors.toList());
defaultMessageStr = StrUtil.join(", ", msgList);
}
return defaultMessageStr;
}
}

分页处理

1
2
3
4
5
6
7
8
9
10
11
12
13
14
15
16
17
18
19
20
21
22
23
24
25
26
27
28
29
30
31
32
33
34
35
36
37
38
39
40
41
42
43
44
45
46
47
48
49
50
51
52
53
54
55
// controller
@ApiOperation(value = "列出片单", notes = "根据参数列出符合要求的片单")
@GetMapping("list")
public ResultMsg<PageInfo<PlaylistCo>> listPlaylist(@Valid PlaylistListQry qry) {
return renderSuccessData(playlistAdminService.listPlaylistByPage(qry));
}
// serviceImpl
@Override
public PageInfo<PlaylistCo> listPlaylistByPage(PlaylistListQry qry) {
List<PlaylistCo> playlistCoList = new ArrayList<>();
// https://pagehelper.github.io/docs/howtouse/
// https://github.com/pagehelper/Mybatis-PageHelper/blob/master/wikis/en/HowToUse.md
// com.github.pagehelper.PageHelper
PageHelper.startPage(qry.getPageNo(), qry.getPageSize());
// 根据状态获取片单
final List<PlaylistEntity> playlistEntityList = playlistService.lambdaQuery()
.eq(qry.getPlayStatus() != null, PlaylistEntity::getPlayStatus, qry.getPlayStatus())
.eq(PlaylistEntity::getDeleted, DeleteType.NOT_DELETE.getCode())
.eq(PlaylistEntity::getCheckStatus, CheckStatusType.APPROVED.getCode())
.list();

if (playlistEntityList.isEmpty()) {
return PageHelpUtils.getPageInfoFromView(playlistEntityList, playlistCoList);
}
// 转换片单实体
playlistCoList = playlistEntityList.stream().map(playlistConvertor::toCo).collect(Collectors.toList());
return PageHelpUtils.getPageInfoFromView(playlistEntityList, playlistCoList);
}
// [Mybatis3.4.x技术内幕(二十):PageHelper分页插件源码及原理剖析 - 祖大俊的个人页面 - OSCHINA - 中文开源技术交流社区](https://my.oschina.net/zudajun/blog/745232)
// PageHelpUtils.java
public class PageHelpUtils {
/**
* 转换数据list为带分页格式
*
* @param dataList 数据list
* @return pageinfo格式的数据list
*/
public static <T> PageInfo<T> getPageInfo(List<T> dataList) {
return new PageInfo<T>(dataList);
}

/**
* 转换数据list为带分页格式,并替换数据为viewlist
*
* @param sourceDataList 数据库对应list
* @param viewList 展现层list
* @return 带分页格式的展现层list
*/
@SuppressWarnings("all")
public static <T> PageInfo<T> getPageInfoFromView(List sourceDataList, List<T> viewList) {
PageInfo pageInfo = new PageInfo(sourceDataList);
pageInfo.setList(viewList);
return pageInfo;
}
}

效果

1
2
3
4
5
6
7
8
9
10
11
12
13
14
15
16
17
18
19
20
21
22
23
24
25
26
27
28
29
30
31
32
33
34
35
36
37
38
39
40
41
42
43
44
45
46
47
48
49
50
51
52
53
54
55
{
"code": "00000",
"msg": "success",
"data": {
"total": 12,
"list": [
{
"id": 2,
"roomId": 1,
"playlistName": "片单2",
"playStatus": 1,
"memo": "备注"
},
{
"id": 3,
"roomId": 1,
"playlistName": "片单3",
"playStatus": 1,
"memo": "备注"
},
{
"id": 4,
"roomId": 1,
"playlistName": "片单4",
"playTime": "2021-03-18 17:53:38",
"playStatus": 1,
"checkStatus": 1,
"checkTime": "2021-03-25 16:18:56"
},
{
"id": 5,
"roomId": 1,
"playlistName": "片单5",
"playStatus": 1,
"memo": "备注"
}
],
"pageNum": 1,
"pageSize": 4,
"size": 4,
"startRow": 1,
"endRow": 4,
"pages": 3,
"prePage": 0,
"nextPage": 2,
"isFirstPage": true,
"isLastPage": false,
"hasPreviousPage": false,
"hasNextPage": true,
"navigatePages": 8,
"navigatepageNums": [1, 2, 3],
"navigateFirstPage": 1,
"navigateLastPage": 3
}
}

数据转换

RestTemplate 交换,未为带下划线的字段映射值 - Javaer101

使用 @JsonProperty 注解

1
2
@JsonProperty("Test_Id")
private String Test_Id; // prefer rename to testId

CROS 跨域处理

1
2
3
4
5
6
7
8
9
10
11
12
13
14
15
16
17
18
19
20
@Configuration
public class CorsConfiguration {
@Bean
public FilterRegistrationBean<CorsFilter> corsFilter() {
CorsConfiguration config = new CorsConfiguration() {{
setAllowCredentials(true);
addAllowedOrigin("*");
addAllowedHeader("*");
addAllowedMethod("*");
}};

final CorsFilter corsFilter = new CorsFilter(new UrlBasedCorsConfigurationSource() {{
registerCorsConfiguration("/**", config);
}});

return new FilterRegistrationBean<CorsFilter>(corsFilter) {{
setOrder(0);
}};
}
}

Spring-Boot 之@Enable*注解的工作原理 - 简书

扫描

1
2
com.lyloou.*;
com.lyloou.**;

**匹配当前包和子包:如 com.lyloou 包下的Bean可以识别,com.lyloou.demo 也可以识别。
*只能匹配子包:如 com.lyloou 包下的Bean识别不了。com.lyloou.demo下面的可以识别。

关于component-scan中base-package包含通配符的问题探究_陈夏明的博客-CSDN博客_basepackages通配符

Spring boot basePackages 通配符* 找不到Bean_小小一只の蜗牛的博客-CSDN博客_basepackages通配符

0%